Tuesday, December 7, 2010

Just Add Snow {Neighbor Gift}

So I'm sure by now you've taken care of the family gifts (if not, it's go time people!) but have you thought about the neighbors yet?  We're already into our second week of December (can you believe it?) and there isn't much time left. 

I've been busy the last few working on my neighbors gifts...if you get started NOW you may have time to whip up a few of your own!


I found this idea last year a little too late but cataloged it as a definite tO dO...LOVED IT.  I thought it was a great alternative to the standard old plate of cookies...and something you can use over and over, year after year.
the SnOWmAn Kit... 
just add snow.

First step: whip up a few hats.  I used this tutorial to make them.  I was seriously scared of screwing these up...but they actually turned out pretty easy and quick to make up...so I made 20!


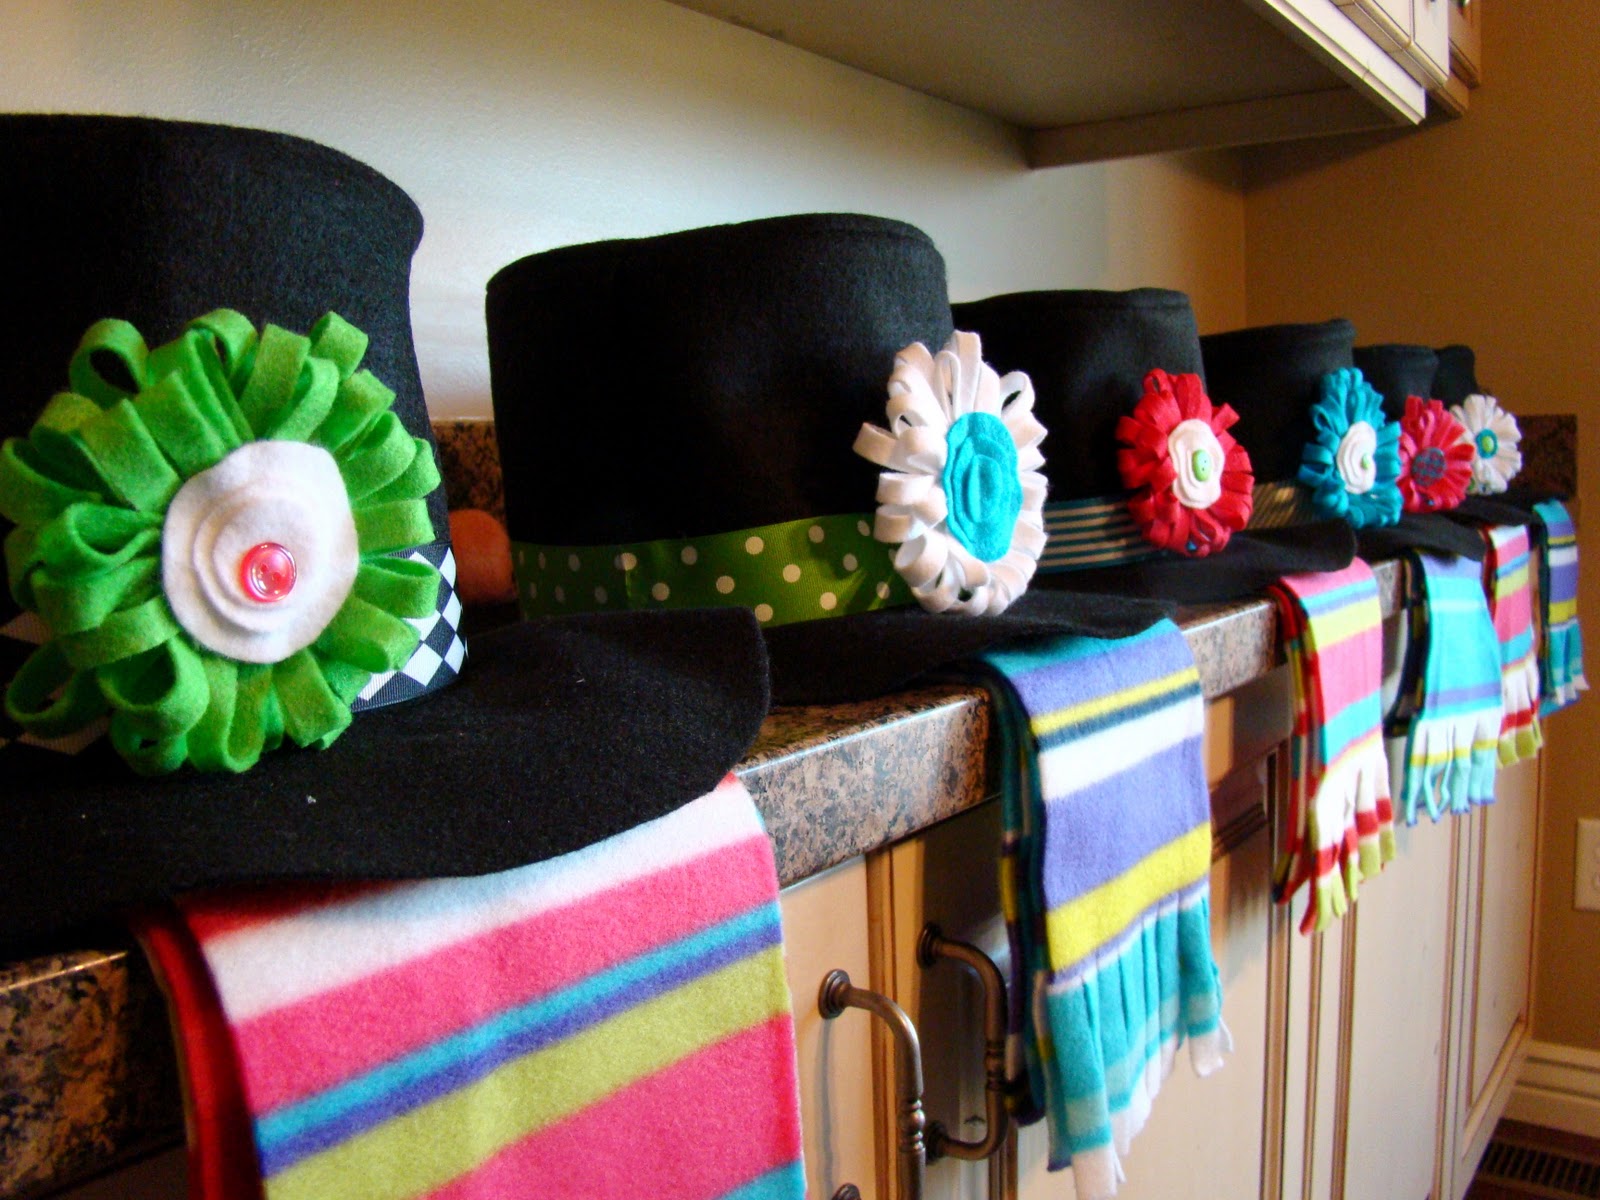
Next step: the scarfs.  Rather than going to the fabric store and buying a yard of fleece for $7.00 a pop (the cheapest I ever found it), I headed to Old Navy and bought 2 fleece blankets for $4.50 each (Black Friday sale...but I went after the crazies had left).  I cut them into 6 inch strips and voila...9 scarfs per blanket.  And they already had the fringe cut!  Can't get easier than that.


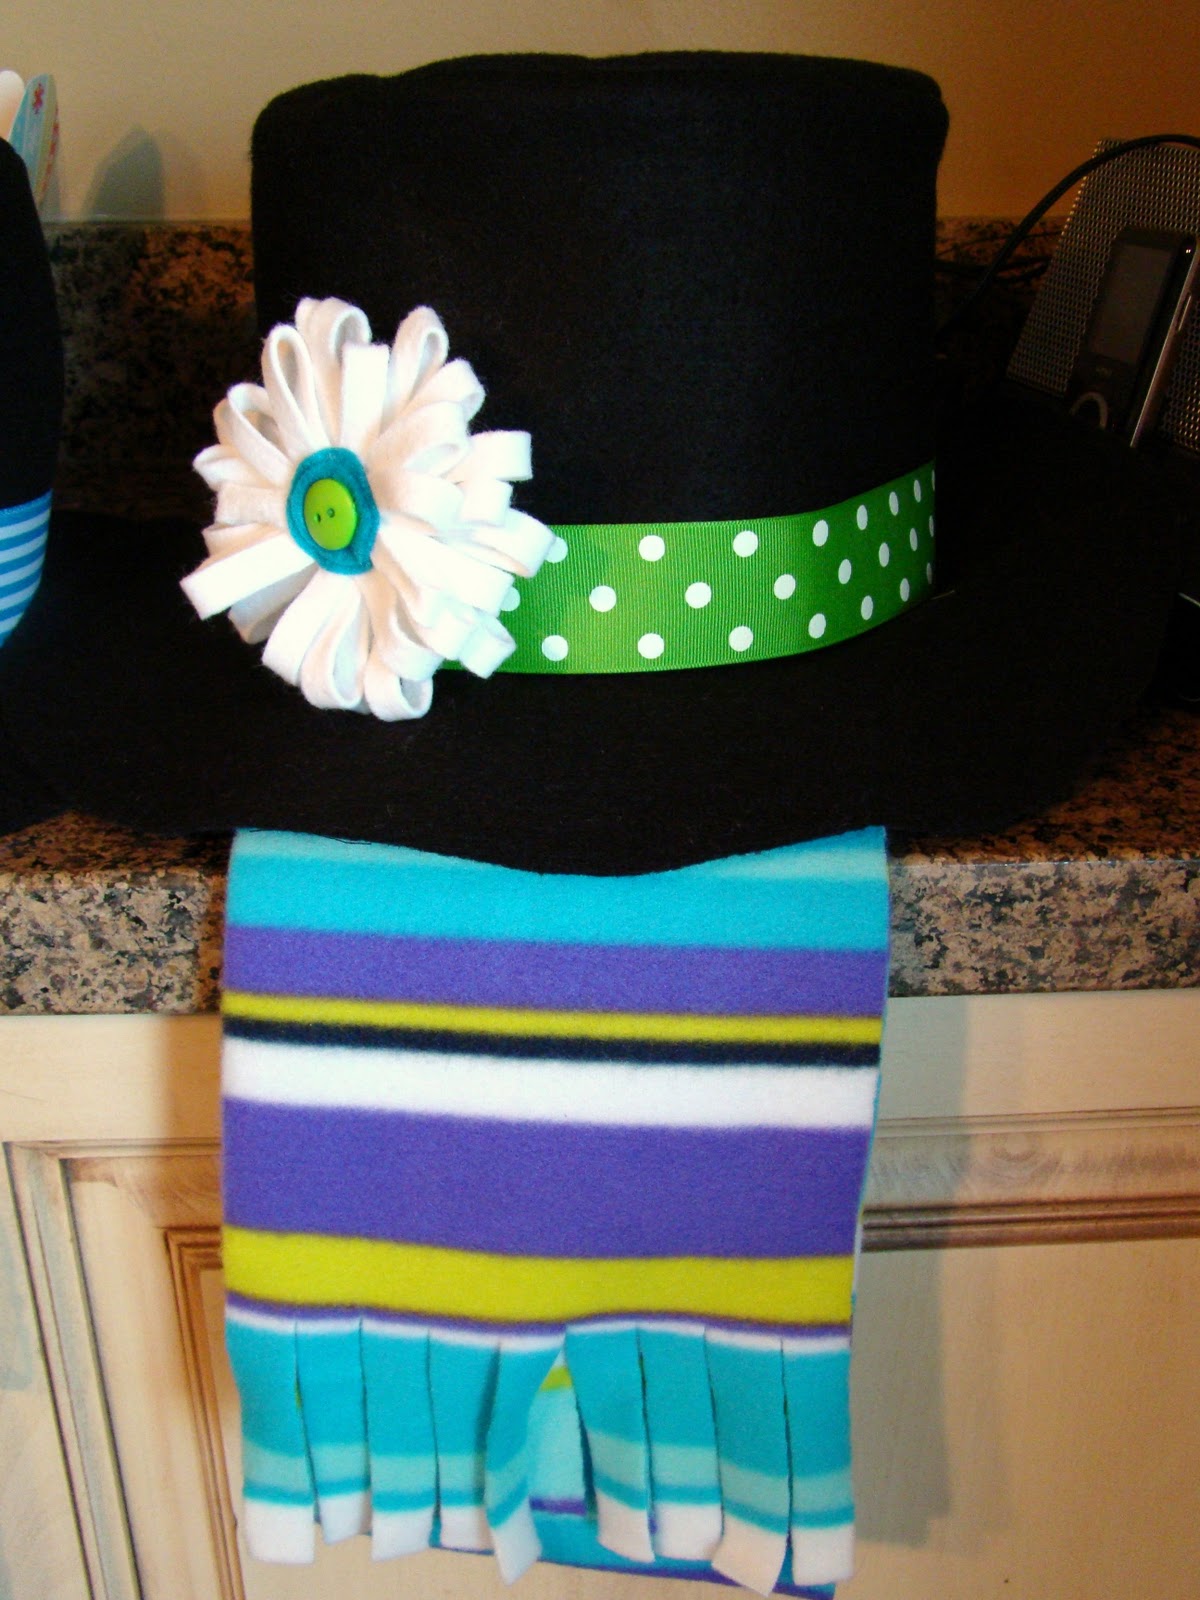
Next to fancy up the hats a bit I added ribbon and made a few of these felt flowers to attach.


Then I wrapped them up.  I cut a circle of cardboard for the bottom of the hat and stuffed them with a little tissue paper...got them ready for delivery.

Boxed up all of the BiTs aNd piECes.


The BiTs include: A feLt CarrOt Nose stuffed and glued to a chopstick...I'm feeling pretty smart about this one!  I had a million Pei Wei chopsticks just sitting in my drawer unused.  They turned out to be just the right size and they're already pointed at the end.  I originally was going to use dowels and sand the ends to a point...but the chopsticks are free if you like Chinese food! 
*A side note...I did try to go get a few more at Panda, but they weren't as good quality.  I didn't end up using them because I thought they might break easily when jamming them into the snow.


And for the other bits, 2 BiG GoOgiLy Eyes, 3 BiG buttOns, and 5 black rocks (for the mouth)...the decorative kind you find in the flower dept.  I got mine at the $ store...they were nice and BiG, too!
I packaged them up individually.  Then put them all in a box for safe keeping.


And last, a tag... 
just in case somebody didn't get it. 
Sometimes you have to spell these things out.


It feels good to have that one checked off my list...

Now if we can just get our snow back!  What good is a Snowman Kit with no snow?!

Friday, December 3, 2010

MiXin' uP the ManTeL

I decided this year to mix things up a bit and do something a little different on the mantel.  Here's an idea of what we looked like last year...stars brightly shinning...


And this year it looks like this...a WinTer WOndeRLanD...


I opted not to decorate our playroom tree this year...lazy...so I had a bit of extra to add to the family room decorations.  I added a bit of blue to the standard red and green and I'm thinking I kind of like it.  It's a little more whimsy and fun.  Reminds me of something off of the Elf movie...witch happens to be one of our all time favorites.


A lot of the big snowflakes came straight from the dollar store (last year)...and most of them in a package of at least 2 or more (we're talking CHEAP).


I think I was originally inspired by this cute print by eighteen25 (pic below) for the color combo.

And just a few more bits of the rest of the room. 
A little ball ornament can go a long way!


And because I just couldn't give up the stars...they're still shinning brightly, just in another room.


Fun to mix it up once in a while, easy way to get a new look with NO money spent.
How are you mixing it up this season?

Tuesday, November 30, 2010

Dear Santa {Printable}


Am I the only one who loves having a little blackmail to hold over my kids head this time of year?  This is me the entire month of December, "Santa's watching you!"  Or, "Santa knows if you've been naughty."  And of course, "He knows when you are sleeping!"  The countdown starts tomorrow (officially).  Its time to get those letters out.  Need a free printable letter for Dear Old Santa?  Check this one out!

Thursday, November 18, 2010

InDiAn cORn favOrs and MaYfLoweR MuffiNs

So as I've mentioned, my 3 year old is having a Thanksgiving Feast at preschool next week and as part of that feast they are going to have some games and crafts for the kids to do.  A friend of mine and I were put in charge of doing a game...have you ever tried to come up with a game for Thanksgiving?  It's tricky.  Thankfully, she's a teacher and had lots of stuff to work with.  We came up with "Don't Eat ToM {the tuRkeY}!"...our version of "Don't Eat PeTe!"  So since she's doing all the work getting the board together for the game I thought I would make a little favor to hand out to the kids...cause games ALWAYS need favors, right!  I was so excited when I accidentally came across this post at It's Always a Party at the Parkers...her and I would get along just fine!!  I loved all of her ideas.  But I was super stoked when I saw her InDiAn cORn favOrs!  So cute and so easy!!  I totally printed off my FREE printables and got to work. 

Made up a few of my own...


And to take full advantage of her creativity, I think I'm going to turn my PB&J muffins into little Mayflower Ships...


(I used scrapbook paper for the bottoms of the ships rather than printing them out).

Peanut Butter and Jelly Muffins

My little guy is having his ThanKsGiviNg fEast at preschool next week...really, it's gonna be quite the feast!  His teacher is so fun and creative and has come up with the idea of having each kid bring a taste of one of their favorite dishes for everyone to share with their friends.  Then they'll all sit down to their own special tHanKsgiViNg feAsT.  She's also going to have a recipe book made up of all the goodies to give to each kid.  SO fUN!

So I was dying to ask my little guy what his favorite dish that mommy makes was, until...he came back with,"Peanut Butter and Jelly!"  Oh, great!  PB&J.  And he was not about to back down, he wanted to share Mom's delicious peanut butter and jelly sandwiches with everyone.  Really I can't blame the kid...I'm no cook that's for sure, but I thought we should at least come prepared with something that actually had a recipe.  So we compromised and came up with Peanut Butter and Jelly Muffins.  He still gets a PB&J (essentially) and I get to fill like I'm actually fulfilling my duty as the mother.


Peanut Butter and Jelly Muffins

Ingredients:

• No-Stick cooking spray
• 2 cups All Purpose flour
• 1 1/2 teaspoons salt
• 1 tablespoon baking powder
• 1 cup milk
• 2 large eggs
• 2/3 cup sugar
• 1 cup Creamy Natural peanut butter, stirred, OR 1 cup creamy peanut butter

• 1/3 cup Pure vegetable oil
• 1/2 cup Seedless strawberry jam OR strawberry preserves
• 1/4 cup sugar


How to make it:

• HEAT oven to 375ºF. Spray muffin pan with no-stick cooking spray. Stir together flour, salt and baking powder in a large bowl. Add milk, eggs, 2/3 cup sugar, peanut butter and oil to bowl. Combine ingredients on low speed of electric mixer, just until moistened. Do not over beat.

• FILL prepared muffin cups evenly with half of the batter. Place 2 level teaspoons jam or preserves in the center of each muffin. Evenly divide remaining batter between muffin cups. Sprinkle with 1/4 cup sugar. Bake 18 to 20 minutes. Remove from oven. Cool in pan 5 minutes.


Wednesday, November 10, 2010

ThankFuL TReEs: ActiVity DaYs


This week for Activity Days we talked about living in ThANksGiViNG daily and how we should be thankful each day for the blessings that we have...not just at Thanksgiving time.  I found some cute journals at Michaels for a buck and gave them to the girls to use as Gratitude Journals.  I told them that they need to try to write in their journals each day for the rest of the month (if not longer). 


I glued a printout of this scripture inside to remind them of blessings of living in ThaNksGiVinG daily...
(thanks again to A Bushel and a Peck for this idea!)

As a craft we made ThaNKfuL trEes to take home and share with their families.


I made a few thankful for tags for the girls to take and have each family member add to their trees.


I used mini clothespins to clip them to the branches.


Their challenge was to go home and share the message of living in ThaNkSgiVinG daily with their families for FHE (one of the ideas for Faith in God requirements) and have everyone add their thankful for tags to the tree.


And to finish them off we added a few leaves.


I printed a bunch of leaves on one page and used my 2 inch punch to punch them out, added a loop of raffia to hang them and then backed them with another circle of card stock.


A fun way to teach the importance of living in ThAnKsgIviNG daily.
The trees can be used year after year.  We have a tradition of taking ours out every November and adding to the branches.  So fun to go back and look at what everyone was thankful for in years previous.

Tuesday, November 9, 2010

tHanKsGiViNg PriNtaBLe


It's simple. It's easy. It's free.
Copy. Paste. Print.


You can find the Keep Calm Print here.


Tuesday, November 2, 2010

A HaPpY HaLLoWeEN...


We had a good one. 
And we've got the treats to prove it...


These little sharks went out...


And they attacked!


Dad even got in on some of action...this way he gets to claim his share of the treats.


A veRy HaPpY HaLLoWeEN indeed!


How was yours?