Showing posts with label faBriC fLoWers. Show all posts

Tuesday, January 25, 2011

pillows.


So the trim has yet to be put up (can't show you the walls we fancied up quite yet), but I couldn't wait to get the crib up and start putting things together a little.  I've been sewing a bit.  And by bit, I mean pillows...that's about as tricky as I get at this point.  So, NO.  I did not make the rest of the bedding...so wasn't ready to branch that far out!  Sewing still scares me quite a bit.  But pillows yes.  I can do pillows.


And before I get nasty emails/comments...they are purely for decorating purposes.  I will fully and entirely remove any suffocation device before placing baby in the crib.  Thanks for your concern, though.

Okay, so I've seen SO many cute pillow ideas floating around out there and have been dying to whip up a few.  Starting with this twisted flower pillow...


Now, I haven't got a tutorial of my own for you...cause really I just made it up as I went, that and...I'm so not qualified to be telling you such stories.  I did, though, find this tute (after the fact) that is probably a much more sophisticated way of doing it than my way.


And while I was there I also found this awesome tute on how to make pin-tucked pillows! So I had to try. And can I say...I'm impressed with myself?!


Never mind that I started with a too small piece of fabric and had to do a little piecing together (hence the ribbon and bow)...I still think it looks like I might have known what I was doing when I put it together :)


Now this one I came up with on my own...I do do that from time to time.  I've always loved pillows that tie on the side.  Everything looks better with a bow, doesn't it?  I also love the look of having a mismatching fabrics on front and back.  So I gave that all a go and came up with this...


Found this cute fabric at Hobby Lobby and thought the nursery rhyme theme was PerFeCt for a nursery!  So I didn't add anything to the front as not to distract from the Cat and the Fiddle and Humpty Dumpty.  How fancy to have a pillow that you can read!


 And finally.  My attempt at a 'stuffed animal'.  Certainly not my best work.  But it was fun to attempt anyway.  It took a bit more effort than I was hoping for and I ended up improvising quite a bit (hot glue!).  Maybe next time I'll look for a pattern rather than trying to fib my way through.


Now let me tell you about the bumper pad and crib skirt.  I bought this set about a year ago (Target clearance).  Are you doing the math?  Yes.  Before there was a baby...and way before it was known to be a girl.  I know I'm crazy like that...let me explain.  $8.00.  Yes sir.  I paid $8.00 for the bumper and $8.00 for the crib skirt!  For a grand total of...$16.00.  And in looking at bedding sets over the last few, I've realized that's quite a DeAL.  I wasn't sure how I was going to make it work, because it wasn't exactly what I was going for.  But again, $16.00.  I figured I would make it work.  Adding the pillows and mixing and matching the fabrics has helped to make the look I was more going for come together.


I do have a few things I would still like to do before we're finished up.  For instance...see that big blue ruffled pillow in the back?  Didn't make it, but found a set of two at TJ Maxx for about $10.  I have BiG plans for a quilt for the second sham.  We'll see if I have to break out the hot glue for that one.  Wish me luck.


NoTe:  As I'm getting ready to post this I'm thinking to myself...I wonder if there is really AnYOne out there who could possibly care this much about stinking pillows.  Really quite a lengthy post on such a subject.  I apologize.

Monday, December 13, 2010

Festive Flowers

Okay, I have one more gift post and then I'm done...I promise.  Then it's possible you may not hear from me until after the hOLidaYs.  I need to enjoy some of it! 
So, I still needed a little something for the teachers, something nice yet festive, just a sweet little treat...cause they do work so hard and totally deserve it!  So I came up with these FeStiVe fLoWers.


I found the cute boxes at Target (dollar spot, again!) which fit Pepperidge packaged cookies perfectly!


So I stuffed a few with those and added a HoLLy FloWer pin.


For another twist I did a few in BLuE ...


These I filled with truffles (cause EVERY teacher deserves a little chocolate!) and added a 'Have a SwEeT Christmas' tag.


And finally, for the Moms...


My mom has asked for a few of these probably a million times but I've never gotten around to making any for her...sorry Mom! So she (and my mom in-law) is getting a whole slue of them for Christmas.


I'm not adding tutorials because, well, I really don't have the time (maybe another time)...but if you look you can find them EVERYWHERE online.  Or even better, make up a few of your own.  The possibilities are endless with these things.  So go on, get festive with your flowers!

Tuesday, December 7, 2010

Just Add Snow {Neighbor Gift}

So I'm sure by now you've taken care of the family gifts (if not, it's go time people!) but have you thought about the neighbors yet?  We're already into our second week of December (can you believe it?) and there isn't much time left. 

I've been busy the last few working on my neighbors gifts...if you get started NOW you may have time to whip up a few of your own!


I found this idea last year a little too late but cataloged it as a definite tO dO...LOVED IT.  I thought it was a great alternative to the standard old plate of cookies...and something you can use over and over, year after year.
the SnOWmAn Kit... 
just add snow.

First step: whip up a few hats.  I used this tutorial to make them.  I was seriously scared of screwing these up...but they actually turned out pretty easy and quick to make up...so I made 20!


Next step: the scarfs.  Rather than going to the fabric store and buying a yard of fleece for $7.00 a pop (the cheapest I ever found it), I headed to Old Navy and bought 2 fleece blankets for $4.50 each (Black Friday sale...but I went after the crazies had left).  I cut them into 6 inch strips and voila...9 scarfs per blanket.  And they already had the fringe cut!  Can't get easier than that.


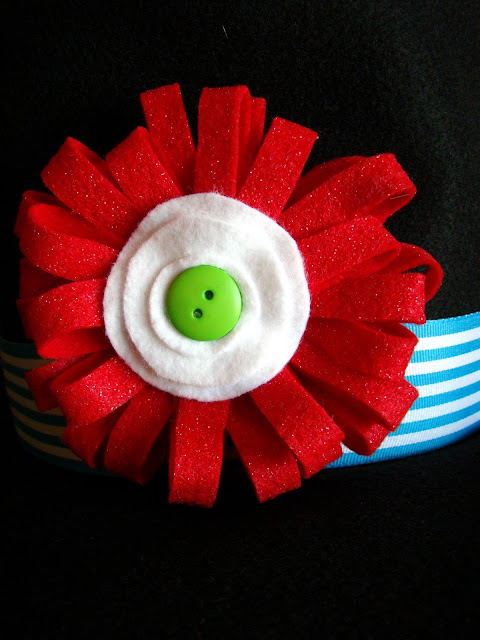
Next to fancy up the hats a bit I added ribbon and made a few of these felt flowers to attach.


Then I wrapped them up.  I cut a circle of cardboard for the bottom of the hat and stuffed them with a little tissue paper...got them ready for delivery.

Boxed up all of the BiTs aNd piECes.


The BiTs include: A feLt CarrOt Nose stuffed and glued to a chopstick...I'm feeling pretty smart about this one!  I had a million Pei Wei chopsticks just sitting in my drawer unused.  They turned out to be just the right size and they're already pointed at the end.  I originally was going to use dowels and sand the ends to a point...but the chopsticks are free if you like Chinese food! 
*A side note...I did try to go get a few more at Panda, but they weren't as good quality.  I didn't end up using them because I thought they might break easily when jamming them into the snow.


And for the other bits, 2 BiG GoOgiLy Eyes, 3 BiG buttOns, and 5 black rocks (for the mouth)...the decorative kind you find in the flower dept.  I got mine at the $ store...they were nice and BiG, too!
I packaged them up individually.  Then put them all in a box for safe keeping.


And last, a tag... 
just in case somebody didn't get it. 
Sometimes you have to spell these things out.


It feels good to have that one checked off my list...

Now if we can just get our snow back!  What good is a Snowman Kit with no snow?!

Thursday, April 22, 2010

3 LuckY Mommas

Thanks so much for the entries!  It was nice to read all the
comments from all you proud moms.

I happen to have 2 little boys who call me momma and I
decided that I would put them to good use and made them pick
my winning numbers...here's what they came up...

fourteen.

ten.

and seven.

That means, Bethany, Grant Family, and Kami you are my winners. 
Please email me your mailing info so that I can get your flowers to you.
Also, if you have a color preference, please let me know! 

And my goodness, a

Happy Mother's Day

 to you all!

Tuesday, April 20, 2010

a littLe somethin' for MoM


I've been making more flowers...I can't give it up.  
Actually, I was in need of a quick, easy (and not to mention, cheap) project for my Activity Day girls to do this month and decided that it should probably be something for the Moms...seeing as, Mother's Day is just around the corner.  So of course, the flower was the obvious choice.  What mom wouldn't want a nice flower to wear on her special day? 
Now, if you're thinking "I would love to have a flower to wear on Mother's Day!"  Guess what...I'm giving a few away.  In honor of Mothers Day, my 75th post and my 50 followers (it's something)...I will be giving away 3 flower pins.  All you have to do is leave a comment, tell me you're a mom (or that you have one) and I'll pick 3 winners this week on Thursday.

GIVE AWAY NOW CLOSED!

...But if you'd rather make one on your own, here's a tutorial on how I made mine...I know, I'm feeling generous...don't get used to it :)


First the supplies you will need:


  •  one full piece of the precut felt

  •  a button (any will do)

  •  hot glue gun

  •  a pin (or hair clip would be fun, too!)


I started by finding a cup in my cupboard to use as my template to trace circles on my felt (about 3 inches round).  Then I traced.  You'll need 6 circles per flower for the petals and then one smaller circle for the base of the flower. 


Once you get them all cut out, take your circle and fold it in half.


Then fold one corner up to make a triangle.


Then fold the other corner back to make an 'S'...something like this...


You'll need to put a dab of glue at the pointy ends on each side to hold your 'S' in place. 
Next you will start glueing your 'triangles' to your base, one at a time, making sure to center them on the base.  Also, make sure you squeeze them nice and close together so that there aren't gaps inbetween you petals.


Once you get them all on there fluff up the petals and they should look something like this...


Not bad, ehh?  But to dress them up just a bit further, glue a button right in the center.  I used fabric covered buttons (you can find kits at any craft store).  You can also cut some leaves from felt and glue them to the back it you'd like, but they're cute enough on their own to just leave them if you prefer.

Last I just glued a pin back on.


And there you have it.  You've got one fun, fashonable, felt flower.  Fabulous.


We are going to make another small craft for our mom's in the next couple of weeks (more on that to come) and these flowers will be perfect to finish off the packaging...serving a dual purpose.